Laminate flooring has become a go-to option for homeowners seeking the perfect blend of style, affordability, and resilience. However, choosing the right laminate floor can be overwhelming due to the many options on the market. From understanding ratings and technical details to visual aesthetics and installation, there’s a lot to consider. If you’re on the verge of finalizing your new laminate flooring, this guide will help you feel completely confident in your decision.
Understanding Ratings: AC Rating and Water Resistance
One of the first things to examine when selecting laminate flooring is the laminate AC rating (abrasion class). This number, typically ranging from AC1 to AC5, indicates the product’s durability and ability to withstand wear. AC1 is suitable for low-traffic areas like bedrooms, while AC3 is ideal for moderate foot traffic such as living rooms. If you’re flooring a high-traffic area like a hallway, kitchen, or commercial space, AC4 or AC5 is your best bet. Knowing the AC rating ensures that the flooring you choose will meet the demands of your space without showing early signs of wear and tear.
Equally essential is the water resistance rating. Traditional laminate floors had a reputation for absorbing moisture quickly, which could lead to warping and damage. However, modern innovations have improved water resistance considerably. Many premium laminate options now feature water-resistant cores and tight-sealing click systems, offering protection for up to 24 to 72 hours. If your floor is going into kitchens, bathrooms, or basements, choosing a product with a strong water resistance rating is crucial. This added layer of protection will preserve your floor’s integrity and appearance for years.
Decoding the Warranty and Manufacturer Reputation
A laminate floor is a significant investment, so you’ll want to be confident that it’s backed by a solid warranty. Pay close attention to laminate warranty details, as they can reveal a lot about product quality. Most reputable manufacturers offer warranties that range from 10 years to lifetime coverage, depending on the grade and usage. Ensure the warranty includes protection against wear, staining, fading, and water damage if applicable. Also, check the fine print—some warranties are voided if the floor is installed in wet areas or without proper subfloor preparation.
Speaking of reliability, the manufacturer reputation is just as important as the warranty itself. A well-known brand with a proven track record of quality, innovation, and customer service is always a safer bet. Companies that have been in the industry for decades often have better quality control and more refined engineering. You can verify reputation by reading user reviews, checking industry awards, or speaking with flooring professionals. Trusting a respected manufacturer not only increases peace of mind but also typically ensures superior product performance and support.
Achieving Realism: Texture, Look, and Thickness
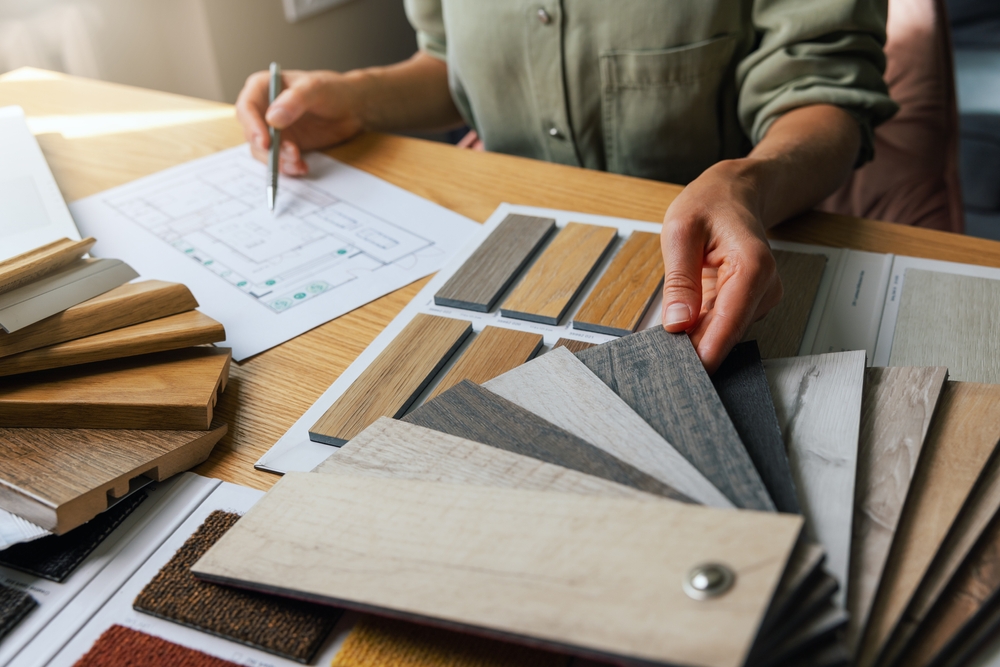
Today’s laminate floors are almost indistinguishable from real hardwood thanks to technological advancements in design and embossing. The realistic texture & look of modern laminate flooring is one of its most compelling features. High-definition printing allows for detailed grain patterns, knots, and color variations that mimic the beauty of natural wood. To add even more realism, look for options with embossed-in-register (EIR) texture. This technique aligns the embossing with the printed grain, creating a tactile surface that looks and feels authentic underfoot.
Another factor to consider is thickness & durability. Laminate planks typically range from 7mm to 12mm in thickness. Thicker boards provide several advantages: they are more stable, feel more solid underfoot, and offer better sound insulation. Thicker laminate is also easier to install over minor imperfections in the subfloor. Durability is tied closely with thickness, AC rating, and core composition. Opt for a product that balances aesthetics with practical strength to ensure longevity in your living space.
The Importance of Proper Installation and Subfloor Preparation
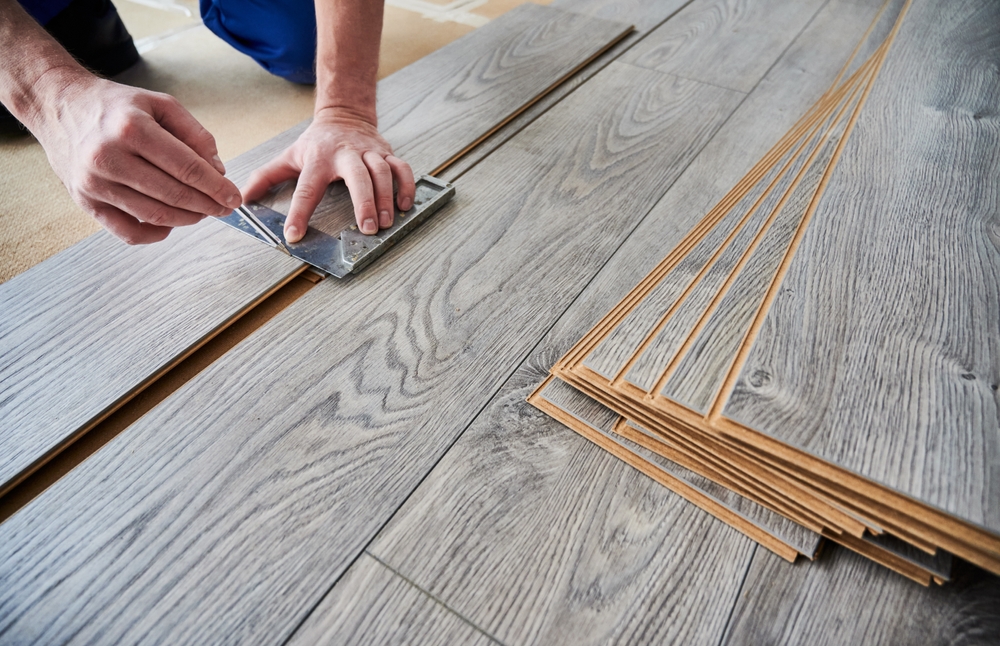
Even the best laminate flooring can underperform if it’s not installed correctly. One of the key advantages of modern laminate is the installation method (click-lock), which allows the planks to snap together without the need for glue or nails. This floating floor system is not only beginner-friendly for DIYers but also enables the floor to expand and contract naturally with changes in humidity. The click-lock method reduces installation time and mess while offering a tight, secure fit.
However, before installation begins, proper subfloor preparation is absolutely critical. A poorly prepared subfloor can lead to uneven surfaces, noisy floors, or even long-term damage to the laminate planks. Ensure that your subfloor is clean, dry, and level. Concrete subfloors may require a moisture barrier, while plywood bases should be smooth and securely fastened. Skipping this step or cutting corners can lead to issues that are often not covered under warranty. Taking the time to get the subfloor right will set the foundation for a beautiful and long-lasting laminate floor.
Confidence Through Comparison and Research
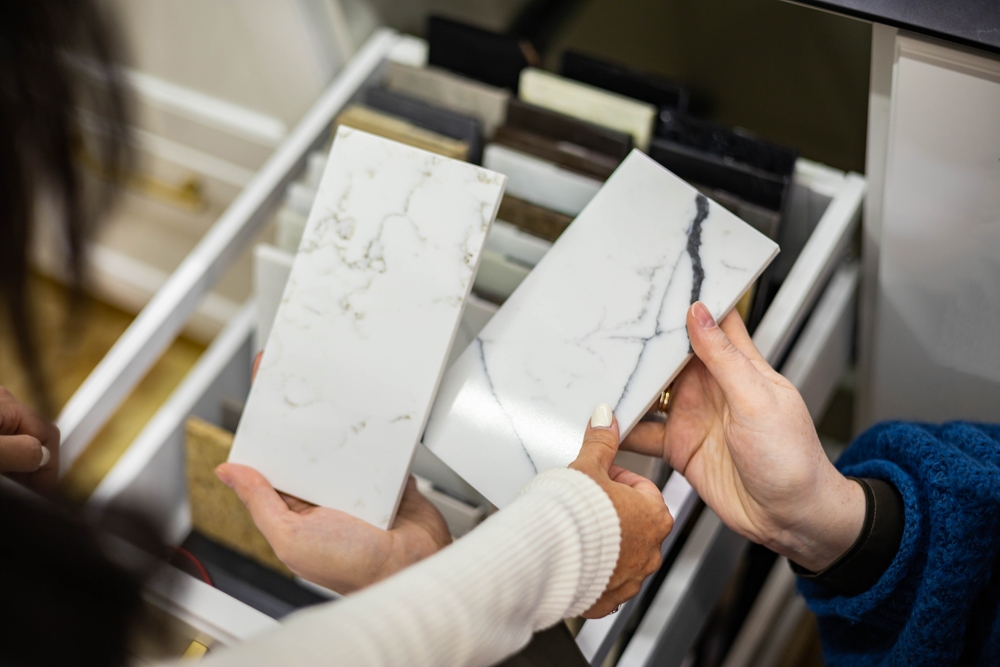
As with any home improvement project, doing your homework will increase your confidence. Compare different products not just based on price but also on performance, features, and visual appeal. Visit showrooms to feel the texture, view the color in various lighting, and assess the board construction firsthand. Ask for product samples so you can see how the flooring looks in your own space alongside your furniture, wall colors, and lighting conditions. This is especially helpful when choosing between various realistic texture & look options, which can vary in tone and pattern.
Online reviews and installation videos can also offer insight into the product’s real-world performance. Consumers often share details about installation experiences, the quality of the locking mechanism, how the floor stands up to pets or children, and any issues that may have arisen after months or years of use. These first-hand accounts are invaluable for understanding how a laminate floor performs over time.
And don’t hesitate to consult with flooring professionals. Whether you’re hiring an installer or working with a design consultant, experienced professionals can help you assess your needs, recommend products based on your lifestyle, and guide you toward options with optimal laminate AC rating (abrasion class), water resistance, and long-term value.
Conclusion
Choosing the right laminate flooring may seem like a daunting process, but with the right information and thoughtful planning, you can feel confident in your selection. Start by understanding the key specifications such as laminate AC rating (abrasion class) and water resistance rating, which influence how well the floor will perform in different settings. Dive into laminate warranty details and research manufacturer reputation to ensure you’re purchasing a reliable product. Prioritize realistic texture & look and consider the thickness & durability to balance beauty and strength. Finally, take care with the installation method (click-lock) and ensure proper subfloor preparation for optimal results.
When all these elements come together, you don’t just end up with a new floor—you gain peace of mind knowing you’ve made a smart, stylish, and lasting choice for your home.
Need Flooring Installation in Wilmington, NC?
Here at Floorz to Your Doorz, we’re here to make your flooring experience as convenient and personalized as possible! Whether you prefer to explore our wide selection of flooring options in the comfort of your own home or want to visit our showroom, we’ve got you covered. From carpets and custom rugs to luxury vinyl planks, hardwood, and window treatments, we’re committed to finding the perfect solution for your space. Serving the East Coastline of North Carolina, reach out today and let us help you transform your home or business with style and ease!
Summer offers a unique window of opportunity for flooring renovations. Longer daylight hours, warmer temperatures, and generally lower humidity in many regions create conditions that can speed up installation and improve material performance. Homeowners often notice that the extra daylight makes it easier for contractors to work longer hours, helping projects wrap up sooner. But beyond convenience, there are technical reasons why flooring prep in summer can yield better results.
For example, many flooring adhesives and sealants cure more effectively in moderate warmth, allowing them to reach optimal bond strength faster. Natural materials like hardwood benefit from acclimating in stable indoor conditions before installation, and summer’s steady temperatures can reduce the risk of expansion or contraction once the boards are laid. However, not all regions have the same climate patterns—humid coastal areas may experience moisture-related challenges, while dry inland climates may cause rapid drying that needs to be managed carefully.
When asking yourself, “does summer affect flooring upgrades?” the answer is both yes and no. Yes, because the environmental conditions influence installation and finishing; no, because good planning and proper climate control can make any season viable. Summer simply gives you a wider margin for success, provided you handle preparation correctly.
The Crucial Steps of Summer Flooring Preparation
No matter the material you choose, flooring prep in summer involves a few non-negotiable steps to ensure lasting results. First is acclimation—especially important for wood, engineered wood, and certain luxury vinyl products. Leaving your flooring material in the installation space for several days allows it to adjust to the room’s temperature and humidity, reducing the risk of post-installation warping or gapping.
Next comes subfloor evaluation. Warm weather can sometimes hide underlying issues such as moisture intrusion from earlier in the year. A proper moisture test should always be performed before installation, even in the driest summer months. This ensures your adhesive bonds properly and your floor remains stable for years.
Cleaning and leveling are equally critical. Summer’s bright light makes imperfections more visible, so sanding, patching, and priming the subfloor before laying down materials is a must. If your flooring choice involves adhesives, be aware that higher temperatures can accelerate curing times, which means you’ll need to work efficiently to spread and set materials before the adhesive skins over. If you’re working with floating floors, summer prep includes making sure expansion gaps are maintained to accommodate seasonal swelling.
The final stage of preparation involves scheduling. Summer is peak season for contractors, so booking your installer well in advance is essential. DIYers benefit from starting early in the day to avoid the hottest afternoon hours, which can affect both the worker’s stamina and the material’s handling properties.
Choosing the Best Materials for Warm Weather Projects
When considering the best materials for summer time flooring projects, the right choice depends on your home’s environment and your lifestyle. Hardwood remains a perennial favorite for its beauty and durability, but in humid climates, engineered hardwood may offer better stability due to its layered construction. Laminate and luxury vinyl plank are both excellent summer installation candidates, as they are less sensitive to humidity fluctuations than solid wood.
Tile is another strong contender for summer projects. Ceramic and porcelain tiles are unaffected by seasonal expansion and contraction, and they offer the added bonus of keeping rooms cooler underfoot—especially appealing in hot climates. If you’re considering natural stone, summer is ideal because sealers and grouts cure more predictably in warm, dry air.
For outdoor or transitional spaces, such as sunrooms or enclosed patios, consider weather-resistant flooring like composite decking or specialized outdoor tiles. These materials are engineered to handle the intense sun and temperature shifts without fading or warping.
In every case, your installer should factor in your region’s specific summer climate. For example, in desert regions, flooring prep in summer must account for rapid adhesive curing, while in tropical climates, extra moisture barriers may be required. The right material matched with the right installation strategy is the foundation of a long-lasting summer flooring upgrade.
How Climate Control Influences Success
Even though summer’s weather seems ideal for flooring, indoor climate control remains one of the most important factors in ensuring the longevity of your new floor. Air conditioning not only keeps the workspace comfortable but also regulates humidity, which is critical for wood, laminate, and adhesive-set floors.
If you’re wondering, “does summer affect flooring upgrades if my home is air-conditioned?” the answer is that climate control can largely neutralize seasonal extremes. By keeping indoor humidity between 35–55% and temperatures between 65–80°F, you provide the optimal environment for most flooring materials. This is especially important during the curing process for adhesives and finishes, which can be sensitive to both high heat and moisture.
For homeowners without central air, portable dehumidifiers and fans can help maintain stability during installation. In some cases, contractors will delay applying final coats of finish until the most humid part of the day has passed, preventing cloudiness or improper curing. On the flip side, in extremely dry climates, temporary humidifiers may be used to prevent over-drying and shrinkage in wood floors.
Ultimately, climate control is the silent partner in every successful summer flooring project. Even the best materials for summer time flooring projects can underperform without stable environmental conditions, so investing in proper regulation during installation is a small cost compared to premature repairs or replacements.
Timing and Aftercare for Summer Installations
One of summer’s biggest advantages is that aftercare can be easier and more predictable. With windows open and ventilation improved, finishes can off-gas and cure more quickly, allowing you to enjoy your new floor sooner. However, it’s important not to rush the process—walking on floors too soon after installation can cause permanent damage, especially in the case of glue-down systems or freshly finished wood.
Plan your project timeline so that the space remains undisturbed for at least 24–72 hours after installation, depending on the material and method used. For example, hardwood finished on-site may require up to a week before rugs and furniture are returned, while click-lock vinyl planks may be ready for light traffic within a day.
Summer aftercare also involves paying attention to cleaning and maintenance during the initial weeks. Avoid wet-mopping wood or laminate floors during this time, as excess moisture can interfere with adhesive bonds or finishes that are still hardening. Instead, use a dry microfiber mop for dust and debris.
Another often-overlooked aspect is UV protection. Summer sunlight is intense, and prolonged exposure can cause fading in certain flooring materials. Using blinds, curtains, or UV-blocking window films can protect your investment from early discoloration. If your new floor covers an area with heavy sun exposure, rotate rugs and furniture periodically to ensure even wear and coloration.
Conclusion
Summer is an excellent season for flooring upgrades, offering longer workdays, faster curing times, and favorable conditions for many materials. But success depends on more than just the calendar—it requires thoughtful preparation, climate-specific strategies, and proper aftercare. By understanding how summer affects flooring upgrades, you can anticipate challenges and choose the best materials for summer time flooring projects that fit your home’s unique conditions.
From thorough flooring prep in summer to meticulous climate control during installation, each step plays a critical role in ensuring your floor’s longevity and performance. With the right approach, your summer flooring project won’t just enhance your home’s beauty—it will deliver comfort, value, and durability for years to come.
Need Flooring Installation in Wilmington, NC?
Here at Floorz to Your Doorz, we’re here to make your flooring experience as convenient and personalized as possible! Whether you prefer to explore our wide selection of flooring options in the comfort of your own home or want to visit our showroom, we’ve got you covered. From carpets and custom rugs to luxury vinyl planks, hardwood, and window treatments, we’re committed to finding the perfect solution for your space. Serving the East Coastline of North Carolina, reach out today and let us help you transform your home or business with style and ease!
Choosing the right flooring for your home or business can be an overwhelming process, especially if it’s your first time embarking on a flooring project. A flooring consultation is a crucial step in ensuring you make the best decision for your needs, preferences, and budget. The consultation processes can vary, but understanding what to expect and how to prepare will help set you up for success. This article will guide you through what to know for your first flooring consultation, from understanding the process to the things to ask during a flooring consultation, and the do’s and don’ts for flooring consultations.
Understanding the Flooring Consultation Process
When you first schedule a flooring consultation, it’s essential to know what you can expect. Typically, a flooring consultation involves meeting with an expert who will assess your space, discuss your needs, and help you choose the best flooring options. The process begins with a discussion about your project and the type of environment where the flooring will be installed. A consultant will want to know about the amount of foot traffic, the type of rooms, and your aesthetic preferences.
Once the consultant has a good understanding of your requirements, they will likely present you with a range of flooring materials. This could include hardwood, laminate, vinyl, carpet, or tile, among others. The consultant will provide insights into the pros and cons of each type, helping you make an informed decision. It’s important to take the time to ask questions and understand the benefits of each option, as some materials may be better suited for specific needs than others.
The consultant will also discuss installation processes and timelines. They will provide you with estimates for the cost of materials and labor, allowing you to get a clear picture of the project’s budget. It’s common for the consultant to offer samples or even bring materials to the consultation to help you visualize how different options will look in your space.
After the consultation, the next step usually involves making a decision on the flooring material and signing a contract for installation. Depending on the type of flooring, installation could take anywhere from a few hours to several days. Understanding the entire process will help you manage your expectations and ensure a smooth experience from consultation to completion.
How to Prepare for a Flooring Consultation
Preparation is key to making the most out of your flooring consultation. Before you meet with the expert, take some time to consider your priorities. Think about the aesthetic you want to achieve, the level of durability you require, and the budget you’re working with. If you have a general idea of what you want but are unsure about the specifics, don’t worry—the consultant is there to guide you.
Take measurements of the rooms where the flooring will be installed. While the consultant will take their own measurements, having an idea of the room’s size can help speed up the consultation process and give you a sense of how much material you’ll need. If possible, remove any furniture from the areas that will be discussed so that the consultant can get a better sense of the space. It also helps to gather any inspiration or design ideas you may have, whether it’s from magazines, Pinterest, or a specific theme you’ve envisioned.
It’s also wise to have a list of questions ready to ask during the flooring consultation. The more information you have upfront, the more confident you’ll feel when making your decision. The consultant may have plenty of insights to offer, but it’s your space and your budget, so it’s important to ask the right questions to ensure you’re making an informed choice.
The Do’s and Don’ts for Flooring Consultations
Navigating a flooring consultation for the first time can feel intimidating, but being aware of the do’s and don’ts can make a huge difference. First, it’s important to be clear about your expectations. Do communicate your needs and preferences openly. Whether you’re looking for something modern, rustic, or eco-friendly, make sure the consultant understands what you’re hoping to achieve. They may even suggest alternatives that align with your goals.
Another important do is to remain open-minded. While it’s great to have an idea of what you want, don’t be afraid to explore options you may not have initially considered. Flooring consultants have a wealth of experience and can often suggest materials or styles that are a better fit for your home or business than you might expect.
On the flip side, don’t rush through the consultation. Take your time to ask questions and gather as much information as possible. Flooring is a long-term investment, and making a hasty decision could lead to regrets later on. Don’t hesitate to ask about the pros and cons of different flooring types, the longevity of materials, or the installation process.
Another important don’t is neglecting your budget. Make sure you’re upfront about what you can afford, including both materials and installation costs. A reputable consultant will work with you to find a solution that fits your budget, but they can’t help if they don’t know your limits. Lastly, don’t forget to consider long-term maintenance. Some flooring materials may require more upkeep than others, so it’s essential to ask about cleaning and care before making a final decision.
Things to Ask During a Flooring Consultation
One of the most important steps in a flooring consultation is asking the right questions. The right questions will help you gather all the necessary information and ensure you are fully informed before making any commitments. Start by asking about the lifespan of different flooring options. How long can you expect a particular material to last with proper care? This is essential information because some flooring materials, like hardwood, can last for decades, while others, such as carpet, may need replacing after just a few years.
Another critical question is about the installation process. How long will the installation take, and what is involved? For example, some flooring types require more preparation work than others, such as subfloor preparation or acclimation of the material to room temperature. Understanding the installation timeline will help you plan accordingly, particularly if you have a specific deadline or time frame in mind.
It’s also important to ask about warranties and guarantees. Many flooring materials come with manufacturer warranties, but it’s important to understand what is covered under those warranties and for how long. Does the installation come with a guarantee, and if so, what does it cover? Knowing this information upfront can save you a lot of stress down the line if issues arise after the flooring is installed.
Don’t forget to inquire about maintenance and care. Every flooring material has its own requirements when it comes to cleaning and maintaining its appearance. Ask for specific care instructions and find out whether the flooring is suitable for your lifestyle. For instance, if you have pets or children, you may want to opt for a material that is more durable and easy to clean.
Finally, make sure to ask for an estimate that includes both materials and installation costs. Having a clear picture of the overall cost will help you avoid any surprises down the road.
Common Mistakes to Avoid During Your First Flooring Consultation
While a flooring consultation can be an exciting step toward a home improvement project, it’s also an opportunity where many homeowners make mistakes that can affect the final outcome. One common mistake is not doing enough research beforehand. Without understanding the basic types of flooring and their benefits, you may end up feeling overwhelmed by the options available. A little research can help you feel more confident when talking to the consultant.
Another mistake is neglecting to consider the room’s usage. The best flooring choice for a living room may not be ideal for a bathroom or kitchen. Some flooring materials are more water-resistant than others, which is an important factor to consider when choosing flooring for high-moisture areas. Not paying attention to the intended purpose of the space could lead to poor decisions.
A third mistake is overlooking long-term costs. While some flooring options may be inexpensive upfront, they might require frequent replacement or more expensive maintenance in the future. It’s important to consider the total cost of ownership, not just the initial price tag.
Lastly, don’t forget to measure the room properly before the consultation. Even though the consultant will measure the space, knowing the size of your rooms beforehand will help the process go more smoothly. It also gives you a better understanding of how much material you’ll need and helps you plan your budget more effectively.
Conclusion
Choosing the right flooring is a big decision, but with the proper preparation and understanding of the consultation process, you can make an informed choice that suits your needs and budget. By following the tips above and asking the right questions, you’ll be well-equipped for a successful flooring consultation and a beautiful end result.
Need Flooring Installation in Wilmington, NC?
Here at Floorz to Your Doorz, we’re here to make your flooring experience as convenient and personalized as possible! Whether you prefer to explore our wide selection of flooring options in the comfort of your own home or want to visit our showroom, we’ve got you covered. From carpets and custom rugs to luxury vinyl planks, hardwood, and window treatments, we’re committed to finding the perfect solution for your space. Serving the East Coastline of North Carolina, reach out today and let us help you transform your home or business with style and ease!
Choosing the right flooring for your space is a crucial decision that impacts both the aesthetics and functionality of your home or office. Whether you’re renovating or moving into a new space, selecting the proper flooring requires careful consideration of factors like durability, maintenance, cost, and style. With so many options available, making an informed decision will ensure your flooring meets both your practical needs and design aspirations. In this guide, we’ll explore the key aspects to consider when choosing new flooring and help you find the best option for your space.
Understanding Your Space and Its Needs
Before selecting replacement flooring, it’s essential to evaluate the specific requirements of your space. Different areas of your home or office have unique needs based on usage, foot traffic, and exposure to elements like moisture and temperature fluctuations. High-traffic areas like hallways and living rooms demand durable materials that can withstand wear and tear, while moisture-prone areas like bathrooms and kitchens require water-resistant flooring.
Consider your lifestyle and household composition as well. If you have pets or young children, opting for scratch-resistant and easy-to-clean flooring can save you from constant maintenance. Additionally, spaces used for relaxation, such as bedrooms, may benefit from softer and warmer flooring options like carpet or cork. Identifying these needs early in the process will help narrow down the most suitable materials for your new flooring.
Exploring Different Flooring Materials
There are numerous flooring materials available, each offering unique benefits and drawbacks. Hardwood flooring remains a popular choice due to its timeless elegance and durability. It adds warmth and character to any space but requires regular maintenance to prevent scratches and moisture damage. Engineered wood is a cost-effective alternative, providing a similar aesthetic with enhanced resistance to humidity and temperature changes.
Laminate flooring is another excellent option for those seeking affordability and durability. It mimics the look of hardwood while being easier to maintain and more resistant to scratches. Vinyl flooring has gained popularity for its versatility, water resistance, and affordability, making it ideal for bathrooms, kitchens, and basements. Additionally, luxury vinyl planks offer a high-end look without the high maintenance of natural wood.
Tile flooring is highly durable and moisture-resistant, making it perfect for bathrooms and kitchens. Ceramic and porcelain tiles come in a variety of designs, allowing you to customize your space to your taste. For a softer underfoot feel, carpet remains a comfortable choice, particularly in bedrooms and living areas. However, it requires regular cleaning and may not be suitable for households with allergy concerns.
Balancing Aesthetics and Functionality
When selecting the proper flooring for a new space, it’s essential to strike a balance between aesthetics and practicality. Flooring significantly impacts the overall ambiance of a room, so choosing a style that complements your décor is vital. Light-colored flooring can make a small space appear larger, while darker tones add warmth and sophistication.
Texture and finish also play a crucial role in achieving your desired look. Matte finishes tend to conceal dust and scratches better than glossy surfaces, making them a practical choice for high-traffic areas. Patterned or textured flooring can add depth and character, while seamless finishes create a modern and minimalist appeal.
Beyond appearance, the functionality of your flooring should align with your lifestyle. If you prefer low-maintenance options, materials like vinyl, laminate, or tile offer hassle-free upkeep. For those who prioritize comfort, carpet or cork flooring provide a softer, cushioned feel underfoot. Ultimately, your flooring choice should reflect both your design vision and everyday needs.
Budget Considerations and Long-Term Value
Budget plays a significant role when choosing new flooring, as prices vary widely depending on material, installation, and maintenance costs. While hardwood and natural stone offer a luxurious appeal, they come with a higher price tag and require more upkeep. Laminate and vinyl provide cost-effective alternatives without compromising on style or durability.
Beyond the initial cost, consider the long-term value of your flooring choice. Investing in high-quality, durable materials may require a higher upfront expense but can save you money on repairs and replacements in the long run. Additionally, some flooring types, such as hardwood, can increase the resale value of your home, making them a worthwhile investment.
When budgeting, also factor in installation costs. Some flooring types, like tile and hardwood, require professional installation, while others, like laminate and vinyl, offer DIY-friendly options. Choosing the right balance between affordability and longevity will help you make a financially sound decision that aligns with your needs.
Making the Final Decision
With a clear understanding of your space, preferred aesthetics, and budget, it’s time to make the final decision on your new flooring. To ensure you’re making the right choice, visit showrooms or request flooring samples to see how different materials look and feel in your space. Testing samples under various lighting conditions and against your existing furniture and décor can help you visualize the final outcome.
Consulting with flooring professionals can also provide valuable insights and recommendations based on your specific requirements. They can help address concerns about durability, maintenance, and installation while guiding you toward the best solution for your home or office.
Ultimately, the right flooring should enhance both the beauty and functionality of your space. By carefully considering all factors, from material and style to budget and maintenance, you can confidently select the proper flooring for your new space. A well-chosen flooring option will not only improve the aesthetics of your home but also offer comfort and durability for years to come.
Need Flooring Installation in Wilmington, NC?
Here at Floorz to Your Doorz, we’re here to make your flooring experience as convenient and personalized as possible! Whether you prefer to explore our wide selection of flooring options in the comfort of your own home or want to visit our showroom, we’ve got you covered. From carpets and custom rugs to luxury vinyl planks, hardwood, and window treatments, we’re committed to finding the perfect solution for your space. Serving the East Coastline of North Carolina, reach out today and let us help you transform your home or business with style and ease!
Your home’s flooring is a significant investment that enhances your living space’s comfort and aesthetics. Whether you’ve chosen hardwood, laminate, carpet, tile, or vinyl, proper care and maintenance can extend the life of your flooring and keep it looking pristine. In this guide, we’ll break down the steps and best practices to ensure your new flooring stays in top shape for years to come.
Understanding Your Flooring Type
Each type of flooring requires unique care methods. To develop an effective cleaning and maintenance routine, it’s crucial to understand the material and finish of your floors.
Hardwood Flooring
Hardwood floors are known for their elegance and durability but can be prone to scratching, moisture damage, and wear.
Laminate Flooring
Laminate flooring is a cost-effective alternative that mimics the appearance of wood or tile. However, it’s susceptible to water damage and cannot be refinished.
Carpet Flooring
Carpet provides comfort and insulation but can accumulate dirt, stains, and odors without regular cleaning.
Tile Flooring
Tiles, whether ceramic, porcelain, or natural stone, are known for their resilience. However, grout lines can become stained over time, requiring attention.
Vinyl Flooring
Vinyl flooring is highly durable and water-resistant, but sharp objects and certain chemicals can cause damage.
General Care and Maintenance Tips for All Flooring Types
Regardless of the type of flooring you’ve chosen, there are some general care practices you should follow to prolong its lifespan:
Use Floor Mats: Place mats at entryways to trap dirt and debris before it reaches your floors.
Maintain a No-Shoes Policy: Encourage family and guests to remove their shoes to prevent dragging in dirt and causing scratches.
Regular Cleaning: Develop a consistent cleaning schedule to avoid the buildup of dust and debris.
Protect Against Furniture Damage: Use felt pads under furniture legs to prevent scratches and dents.
Specific Care Tips by Flooring Type
Hardwood Flooring Care
Daily and Weekly Care
Sweep or Vacuum Regularly: Use a soft-bristled broom or a vacuum with a hardwood attachment to prevent scratches.
Dry Mopping: A microfiber mop can pick up fine dust particles without scratching the surface.
Deep Cleaning
Avoid Excess Moisture: Use a damp (not wet) mop with a pH-neutral wood cleaner. Avoid steam cleaners as they can warp the wood.
Reapplying Finishes: Depending on wear, consider refinishing your hardwood floors every 5-10 years to restore their shine.
Additional Tips
Avoid Harsh Chemicals: Steer clear of abrasive cleaners and oils that can damage the finish.
Maintain Humidity Levels: Use a humidifier in dry seasons and a dehumidifier during humid months to prevent wood from shrinking or expanding.
Laminate Flooring Care
Routine Cleaning
Dry Dusting: Sweep with a soft broom or use a dry mop to remove dirt and debris.
Vacuuming: Use a soft brush attachment to avoid scratches.
Deep Cleaning
Avoid Excess Water: Laminate is highly sensitive to moisture. Use a lightly dampened microfiber mop with a laminate-safe cleaner.
No Steam Cleaning: Avoid steam mops, as the heat and moisture can cause the planks to swell.
Preventive Measures
Use Furniture Pads: Prevent gouges by placing pads under heavy furniture.
Quick Cleanup: Wipe up spills immediately to avoid permanent damage.
Carpet Flooring Care
Daily and Weekly Care
Vacuuming: Vacuum high-traffic areas frequently, ideally daily, to prevent dirt buildup.
Spot Cleaning: Address spills immediately using a clean, dry cloth to blot the stain. Avoid rubbing, as this can push the stain deeper.
Deep Cleaning
Professional Cleaning: Hire a professional carpet cleaning service every 12-18 months to deep-clean and refresh your carpet.
DIY Methods: If using a home carpet cleaner, use manufacturer-recommended solutions and follow instructions carefully.
Stain Prevention
Use Area Rugs: Place rugs in high-traffic zones to protect the carpet underneath.
Avoid Eating in Carpeted Areas: Minimizing food and beverage consumption in carpeted rooms can reduce spills.
Tile Flooring Care
Regular Cleaning
Sweep or Vacuum: Regularly sweep or vacuum to remove debris that can scratch the tiles.
Mop with Warm Water: Use a damp mop with a pH-neutral cleaner to keep the tiles clean.
Grout Maintenance
Clean Grout Lines: Use a grout cleaner and a soft brush to remove stains and restore brightness.
Seal the Grout: Apply a grout sealant every 1-2 years to prevent stains and moisture infiltration.
Avoid Common Pitfalls
No Abrasive Scrubbers: Avoid steel wool or harsh brushes that can scratch the tile surface.
Avoid Acidic Cleaners: Skip cleaners with vinegar or lemon on natural stone, as they can etch the surface.
Vinyl Flooring Care
Routine Maintenance
Sweeping and Mopping: Sweep daily and mop weekly using a mild detergent and water solution.
Avoid Standing Water: Even though vinyl is water-resistant, standing water can seep through seams and cause issues.
Protective Measures
Use Doormats: Prevent scratches by trapping debris with mats.
Avoid Sharp Objects: Vinyl is susceptible to cuts from sharp items, so handle furniture and appliances with care.
Avoid Harsh Cleaners
No Wax or Abrasive Cleaners: These can dull the finish and cause long-term damage.
Preventing Common Flooring Issues
Scratches and Dents
Use Area Rugs: In high-traffic areas, place rugs to provide additional protection.
Furniture Pads: Use felt pads and furniture coasters to prevent heavy items from damaging the floors.
Water Damage
Quick Cleanup: Wipe up spills immediately.
Use Dehumidifiers: In damp environments, a dehumidifier can help control moisture levels.
Stains and Discoloration
Use Protective Mats: Place mats near sinks and other water-prone areas.
Avoid Direct Sunlight: Use blinds or curtains to prevent UV rays from fading your floors.
Seasonal Care Tips
Summer Care
Monitor Humidity: Hot, humid conditions can cause some flooring types to expand.
Increase Ventilation: Use fans and air conditioning to maintain airflow.
Winter Care
Prevent Salt and Snow Damage: Use a waterproof mat at entryways to prevent salt and moisture from damaging floors.
Maintain Humidity: Heating systems can dry out the air, so using a humidifier can help protect wood floors.
Conclusion
Proper flooring care starts with understanding the specific needs of your flooring type and implementing preventive measures to avoid damage. By following a consistent cleaning schedule, addressing spills and stains promptly, and protecting your floors from heavy traffic and furniture, you can preserve their beauty and functionality for years. Remember, small efforts go a long way toward maintaining your investment, making your home feel fresh and inviting every day.
Need Flooring Installation in Wilmington, NC?
Here at Floorz to Your Doorz, we’re here to make your flooring experience as convenient and personalized as possible! Whether you prefer to explore our wide selection of flooring options in the comfort of your own home or want to visit our showroom, we’ve got you covered. From carpets and custom rugs to luxury vinyl planks, hardwood, and window treatments, we’re committed to finding the perfect solution for your space. Serving the East Coastline of North Carolina, reach out today and let us help you transform your home or business with style and ease!